
A garage door opener takes orders from two separate inputs. The remote reaches it by radio, through a receiver on the opener's logic board, and the wall control reaches it over a thin pair of low-voltage wires running from the button to the terminals on the back of the opener head. A remote that still runs the door clears a long list of suspects at once: the head has household power, the motor turns, the drive moves the door, and the logic board is reading commands. What is left is the wall control's own path: the button or console on the wall, the wire between the wall and the opener, the terminals where that wire lands, and the input on the board that reads it. Follow that path from the wall to the opener, and the clues along it narrow the fault to one part.
Each clue that can be seen or heard from the garage floor lines up with a likely cause on that path and the repair it leads to:
| Clue | Likely Cause | What the Repair Involves |
|---|---|---|
| A console that was lit has gone dark | A failed console, or power lost on the wire pair that feeds it | Testing the pair at both ends, then replacing the console or the wire |
| No light and no click from the opener at all | A broken or pinched wire somewhere in the run | Testing the run for continuity and replacing the damaged length |
| It works for a while after the wire is disturbed, then quits again | A loose terminal at the opener head or the console | Re-making the connection at the loose terminal |
| It stopped right after a new opener went in | A wall control that does not match the new opener | Fitting a control made for that opener |
| It stopped after a power outage or surge | A damaged board input | Testing the input and replacing the logic board if it has failed |
| It stopped after shelving, drywall or storage went up | A wire pierced or crushed during that work | Opening up the run near the new work and replacing the wire |
| The light and lock buttons respond, but the door button does not | A failed door switch inside the console | Replacing the console |
Two Inputs Into One Opener
The radio receiver and the wall-control input both feed the same logic board, and the board treats a command from either one the same way: it starts the motor, watches the travel limits, and keeps the reversing system armed. That shared back end is why a working remote carries so much information. Every shared part has just proven itself, so nothing about the motor, the belt or chain, the trolley or the travel settings explains a silent wall button. The two input paths part ways only at the board, where the radio signal arrives through the receiver, and the wall signal through its own pair of terminals. The reverse case, a remote that fails while the wall button still works, lives on the radio side and follows a different set of causes.
Plain Push Buttons and Multi-Function Consoles
Wall controls come in two broad kinds, and the kind on the wall changes what a dead button means. A plain push button is a switch and nothing more. Pressing it closes a contact that joins the two wires; the opener senses that closed circuit across its terminals, and the door moves. There is no light, no electronics, and nothing to power, so a plain button either makes contact or it does not.
A multi-function console carries its own small circuit board. It draws power from the opener over the same two wires it signals on, which keeps its light glowing, and it sends the opener coded signals that distinguish a door command from a light or lock command. That design turns a lit console into a test: its glow shows that power is reaching it over the wire pair, which rules out a fully broken wire and a fully disconnected terminal, and shifts suspicion toward the console itself or the board's reading of it. A console whose light and lock buttons respond while its door button does nothing narrows it further, to the door switch inside the console, since the other buttons share the same wire, the same power, and the same board input.
The two kinds do not swap freely across openers. An opener built to read coded signals from a console can ignore a plain contact closure, and a console built for one opener's coding can sit dark or unresponsive on another. Replacing a failed control means matching it to the opener it serves.
The Wire Run From the Wall to the Opener
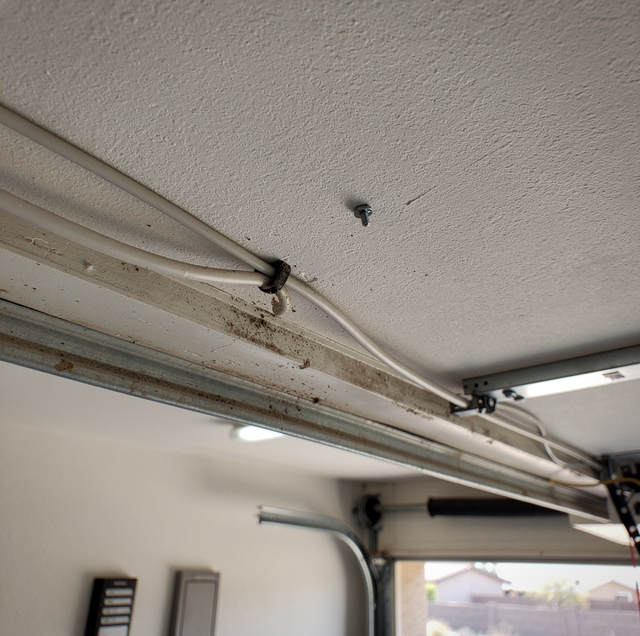
Between the console and the opener head runs a two-conductor low-voltage wire, fastened up the wall and along the ceiling to the back of the head. A fastener driven through the jacket can sever a conductor and open the circuit, or join the two conductors and leave the circuit shorted; either way, the wall signal no longer arrives as a clean press. A spot where the wire bends hard over a ceiling edge or a joist can break the copper inside a jacket that still looks whole. Shelving brackets and storage racks screwed into the wall can land on the wire, and boxes stacked against a run near the ceiling can crush it. New drywall can trap the wire with a screw through it. Rodents can chew through the insulation, and a chewed spot can let the two bare conductors touch or pull apart.
A wall button that went dead the same week shelves went up, a ceiling was finished or a storage rack was bolted in has an obvious first place to look: the stretch of wire nearest that work. A break within an intact jacket is invisible, so a run has to be tested for continuity end to end rather than judged by eye, and any length that fails the test is replaced.
Terminals at the Opener Head
At the opener head, the wall-control wire connects to a pair of screw terminals or push-in connectors, next to the safety sensor terminals. A connection there can work loose as the opener vibrates through its cycles, a screw can back off, and bare copper can corrode until it no longer makes steady contact. A single stray strand can reach across to the neighboring terminal. The signs of a loose terminal are a button that responds to one press but ignores the next, or a console light that flickers. The same faults can occur at the console end, where the wire lands on the back of the wall unit, and on some consoles a stray strand of excess wire resting against the console's own circuit board is enough to stop it working.
None of this is homeowner work.
The opener head runs on household power, so reaching its terminals from a ladder beside the motor housing poses a risk of electric shock and a fall. That work belongs to a technician, who unplugs the unit before any wire or terminal is touched.
A Mismatched Wall Control on a New Opener
A wall button that quit the day a new opener went in is a compatibility question before it is a wiring one. Reusing the old control on a new head is tempting, but a console built for the old opener's signaling can go unread by the new board, and a plain button can go unread by a board expecting coded signals. The repair is a wall control made for the new opener; whether the opener itself was the right choice is a separate decision.
Board Input Damage After a Surge
A wall control that died during an outage, a power flicker, or a surge, while the remote carried on, can have lost the board input that reads it. A surge can reach the logic board through the power cord, and a long wall-control run can also carry an induced spike to the terminals it lands on. The input circuit behind those terminals is a separate section of the board from the radio receiver, so a spike can take out the wall side and leave the remote side working. A surge is one cause of that pattern among several: a console that failed on its own, a loosened terminal, and a damaged wire produce the same symptom, which is why the console and the run are tested before the board is blamed. When the input has failed, the repair is a replacement logic board.
Running the Door Safely Until the Repair
The remote keeps the door usable, and the door retains all its safety systems: the reversing function and the photo-eye sensors work the same way, regardless of which input sent the command. Each trip is still watched from start to finish, with the door followed all the way to the floor and people and pets kept clear of its path until it has closed, since a remote can be pressed from anywhere, including from a car that is already pulling away. Holding any button down to push past a reversal has no place in the workaround either.
Joining the wall-control terminals with a jumper wire to test the opener is ruled out: the sensor terminals sit beside them on the head, and a jumper across the wrong pair can damage the board it was meant to test. Working at the head at all is ruled out too, because it means a ladder and a unit on household power, and the head is unplugged and any backup battery disconnected before anyone touches it.
Frequently Asked Questions
On a plain push button, no: the button only joins the two conductors, so either wire can land on either screw. On some multi-function consoles it does matter, because the console needs its power in a set direction, and a pair landed in reverse can leave the console dark even with both connections tight. On some wire, one conductor carries a stripe or a ridge so the two can be told apart at each end.
Yes, on openers that accept one. A wireless wall control runs on its own battery and reaches the opener by radio, the same path the remote uses, so it works with no wire between the wall and the head. The trade-off is a battery that will need replacing at some point, which a wired control avoids because it draws power from the opener.
No. A wired control is connected to the opener by its wire rather than paired with a learned code, so an outage leaves nothing stored in it to erase. Remotes and keypads carry learned codes; the wired console carries none, so re-pairing it offers nothing.
High enough to stay out of a small child's reach, and in a spot with a clear view of the door so whoever presses it can watch the door travel. It also belongs clear of the door's moving parts, so nobody has to reach past a track or a spring to press it.
Yes, as long as the keypad itself is working. A wireless keypad on the outside wall sends its command by radio to the same receiver the remote uses, so it follows the remote's path and skips the wall-control wire entirely.
A thin two-conductor wire of the same kind used for doorbells. Because the current it carries is small, it can run along a ceiling under insulated staples rather than in the heavier cable used for household circuits.
Enlist garage door opener repair for a dead wall control — wall control, wire run and opener-terminal testing, plus console or wiring replacement. Mesa Garage Door Repair serves Mesa and the East Valley. ROC #341884. Call (480) 906-4474.